
티스토리 뷰
이전 글에서 @RequestBody 바인딩 처리를 알아보았고 이번에는 @ModelAttribute 처리에 대해 알아보자
스프링 버전에 따라 라인 수가 달라질 수 있으니 사진 설명에 클래스#메서드 형태로 남겨놨다
어떤 메서드를 호출하는지에 주의해 흐름을 따라가보자, 테스트할 객체와 컨트롤러는 아래 더보기를 참고하면 된다
@XmlAccessorType(XmlAccessType.PROPERTY)
@XmlRootElement(name = "data")
@AllArgsConstructor
@NoArgsConstructor(access = AccessLevel.PROTECTED)
@Getter
@ToString
public class TestRequest {

	@XmlElement(name = "xml_name")
	private String name;

	@XmlElement(name = "xml_age")
	private int age;

	@XmlElement(name = "xml_inner")
	private TestInnerRequest testInnerRequest = new TestInnerRequest();

	@XmlAccessorType(XmlAccessType.PROPERTY)
	@AllArgsConstructor
	@NoArgsConstructor(access = AccessLevel.PROTECTED)
	@Getter
	@ToString
	public static class TestInnerRequest {

		@XmlElement(name = "xml_inner_name")
		private String innerName;
	}
}
@Slf4j
@Controller
public class MappingTestController {

	@ResponseBody
	@PostMapping(
		value = "/test/request-body",
		produces = { MediaType.APPLICATION_JSON_VALUE, MediaType.APPLICATION_XML_VALUE }
	)
	public TestRequest testRequestBody(@RequestBody TestRequest testRequest) {
		log.info("testRequest = {}", testRequest);
		return testRequest;
	}

	@ResponseBody
	@PostMapping(
		value = "/test/model-attribute",
		produces = { MediaType.APPLICATION_JSON_VALUE, MediaType.APPLICATION_XML_VALUE }
	)
	public TestRequest testModelAttribute(@ModelAttribute TestRequest testRequest) {
		log.info("testRequest = {}", testRequest);
		return testRequest;
	}
}
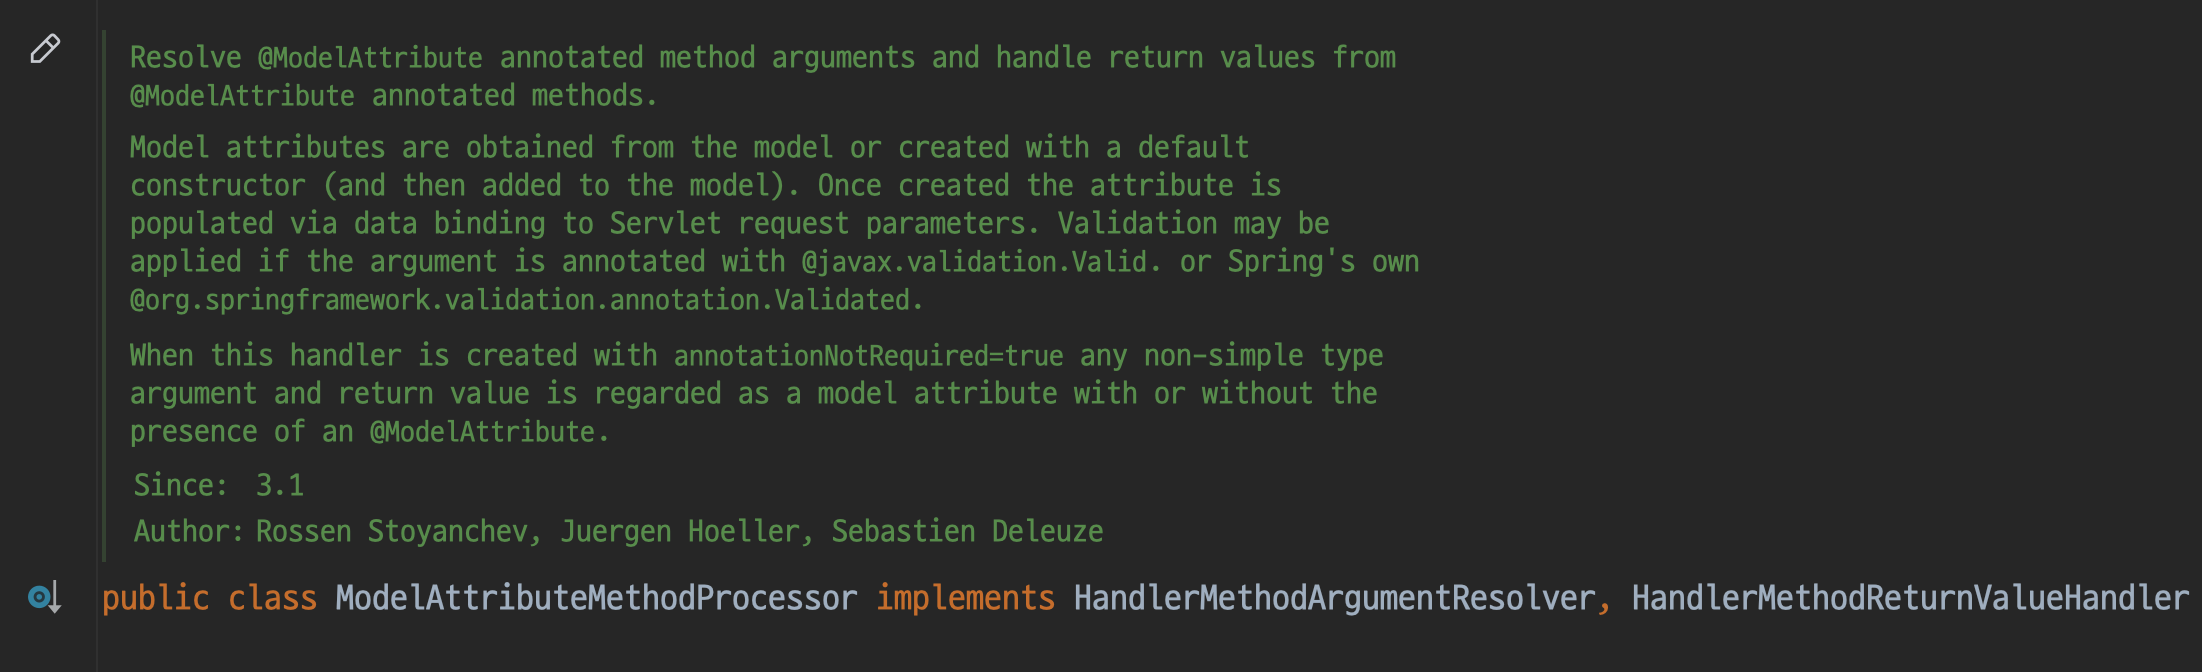
@ModelAttribute 처리는 직관적인 네이밍을 가진 ModelAttributeMethodProcessor에서 시작된다
141 라인에서 ModelAndViewContainer에 @ModelAttribute에 해당하는 객체가 들어있는지 확인한다
일반적인 상황에서 ModelAndViewContainer는 어떻게 사용되는지는 잘 모르겠고
MockMvc를 활용한 테스트에서 flashAttr() 활용해서 객체를 통으로 넣어줄 때 ModelAndViewContainer에 들어간다
ResultActions result = mockMvc.perform(
  post("/test").flashAttr("vo", vo)
);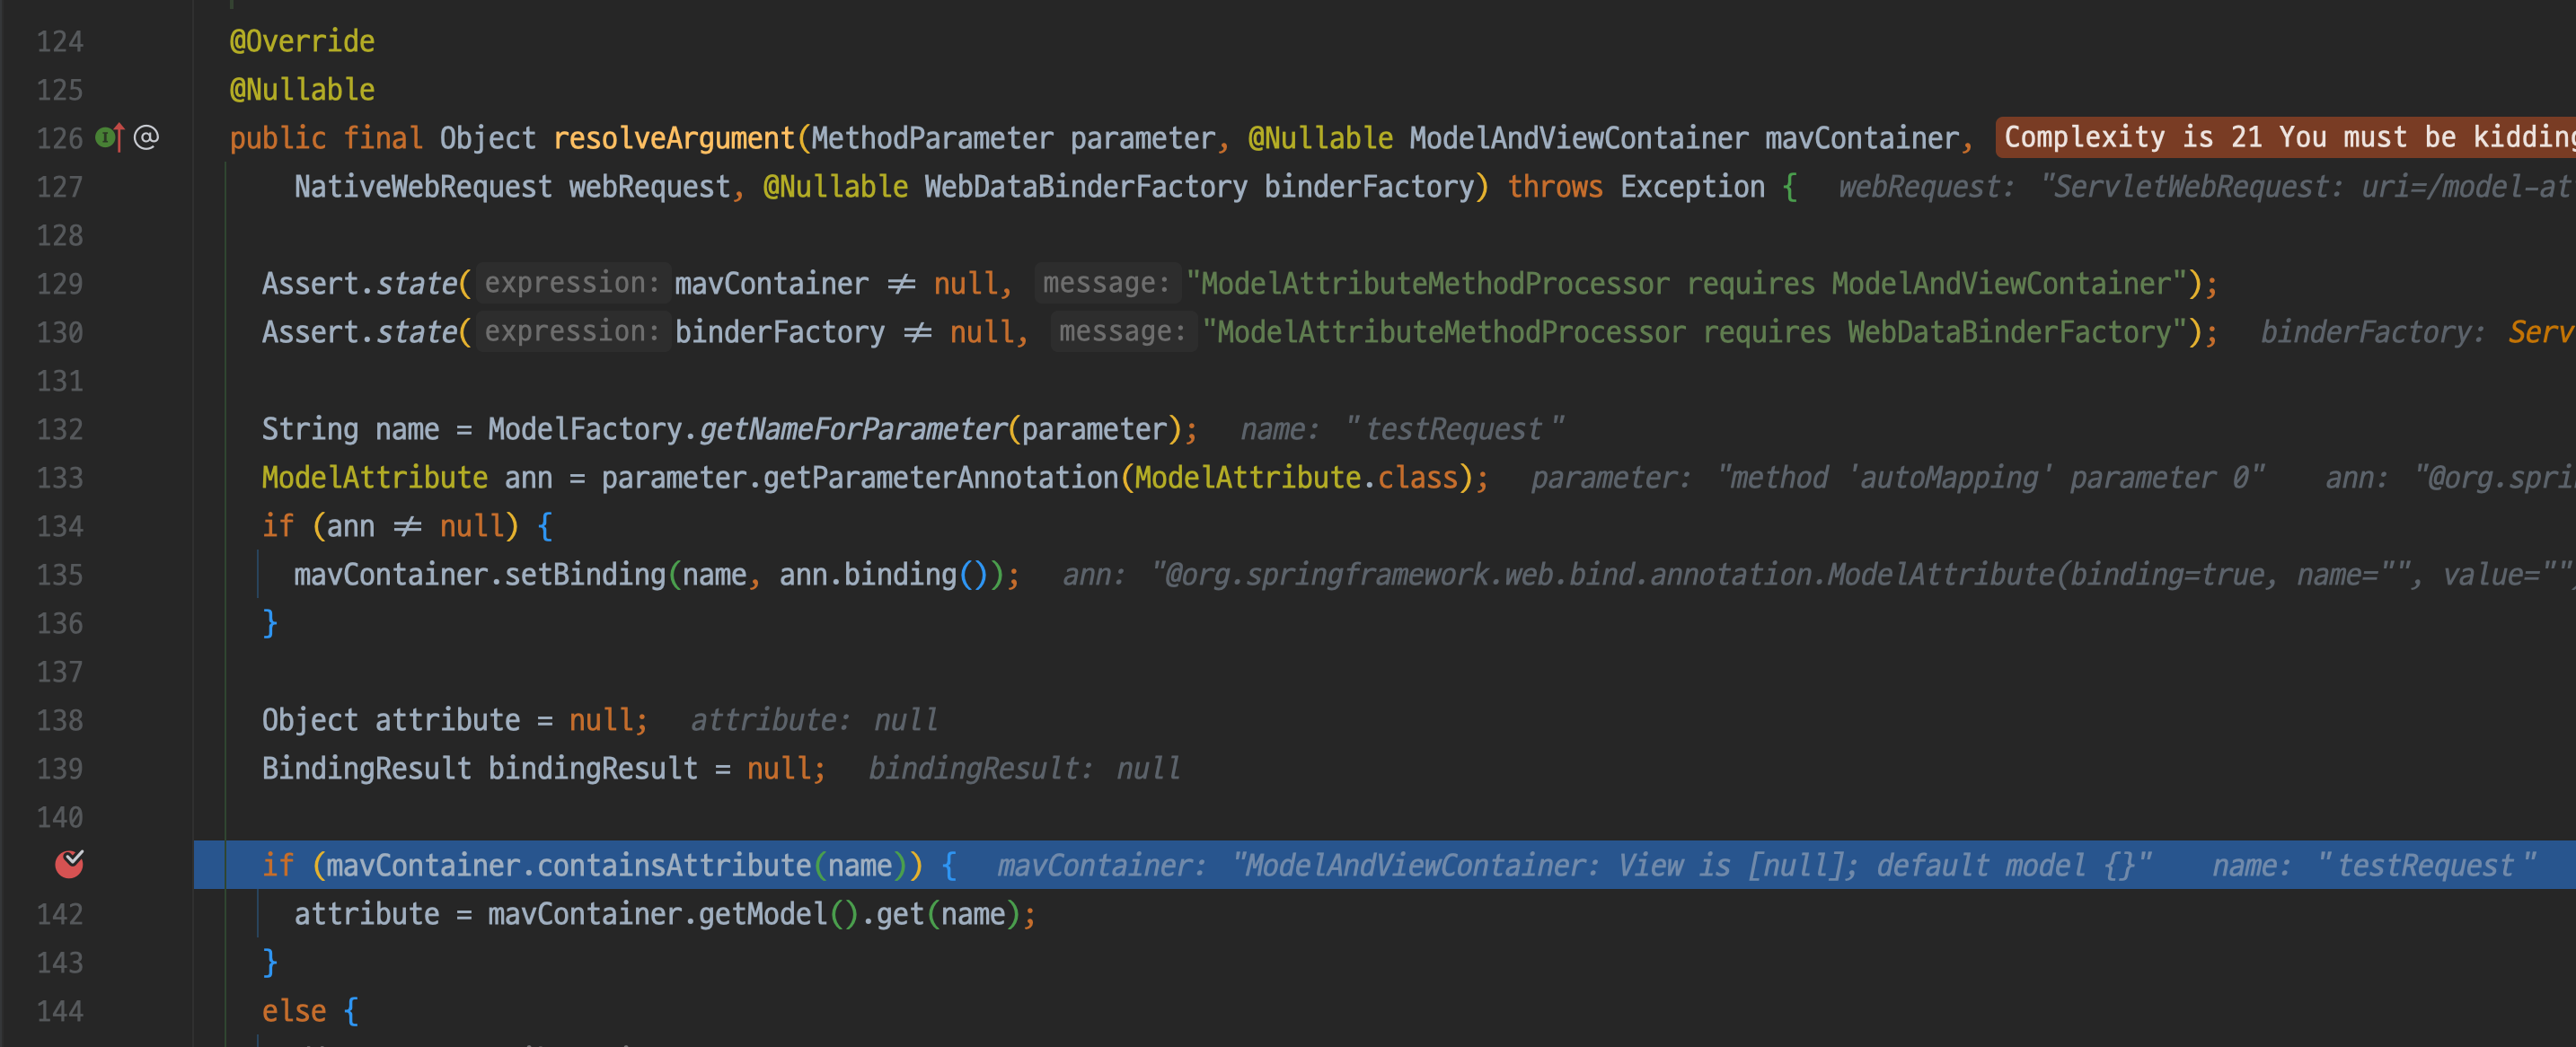
ModelAndViewContainer에 없다면 attribute를 직접 만들어야 한다, 이 과정은 url parameter에서 뽑아내 진행된다
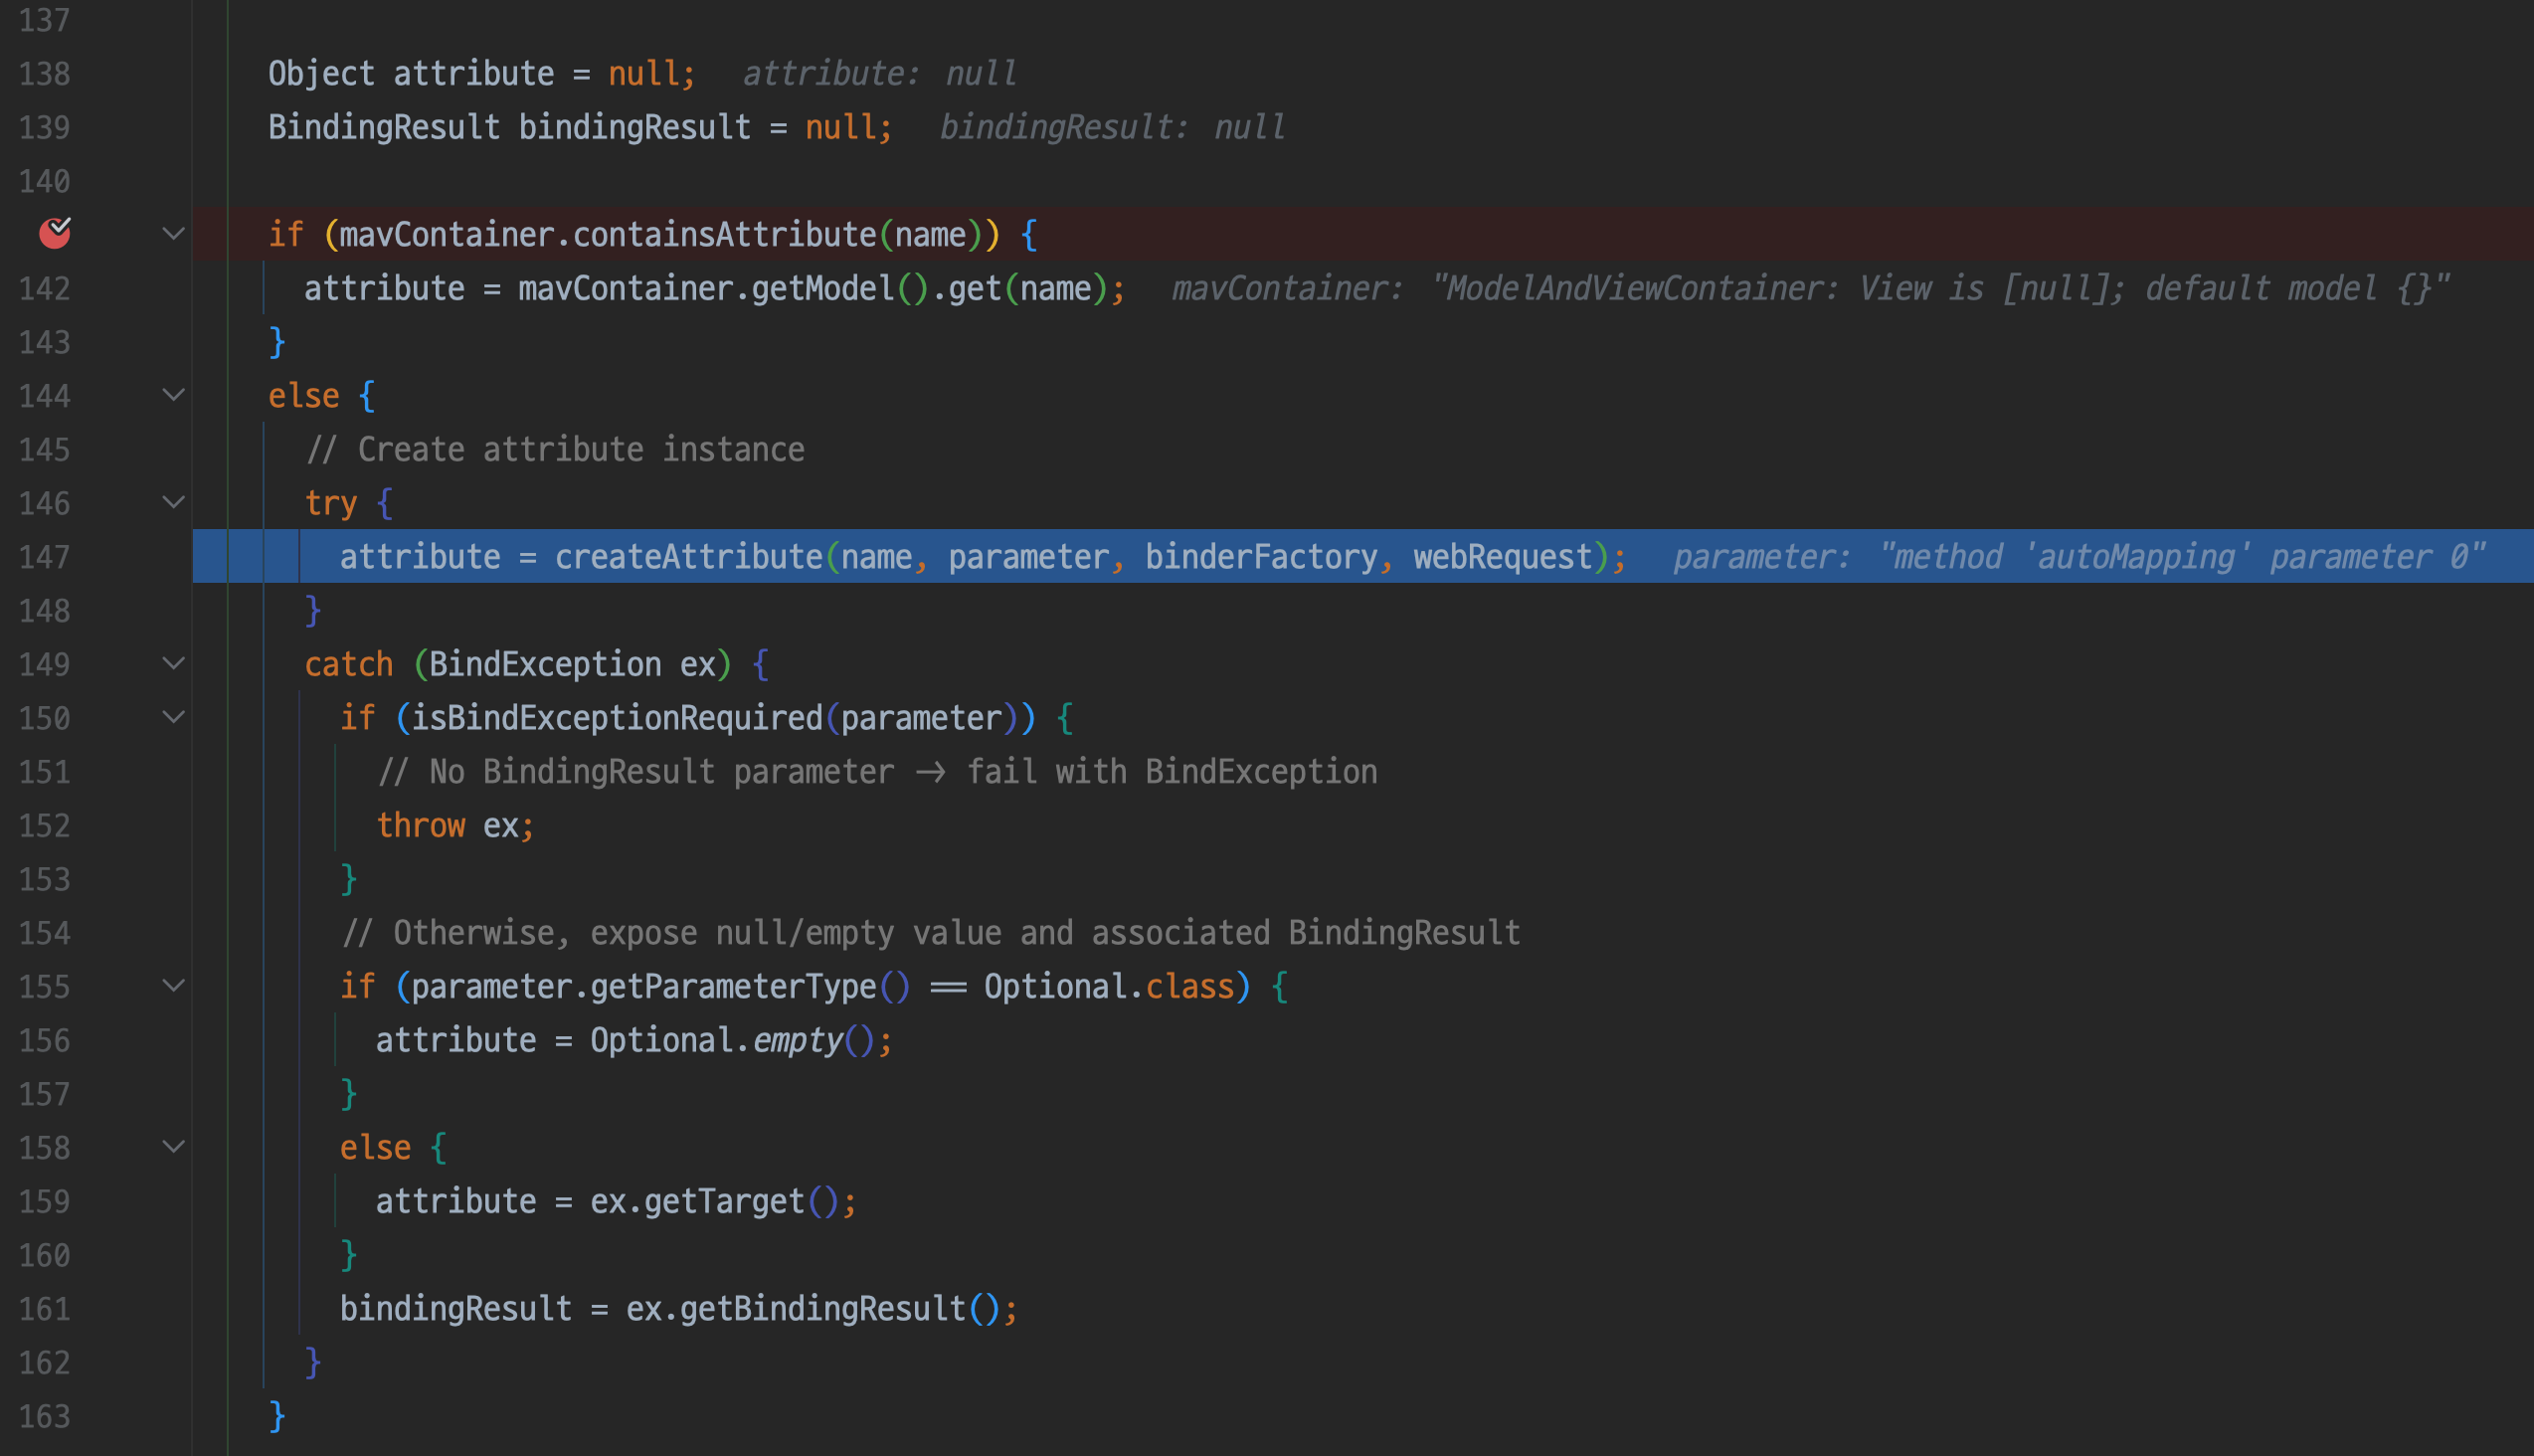
219 라인을 통해 사용 가능한 생성자를 뽑아내는데 가시성 & 인자 개수를 고려해 단 하나의 생성자만 선택된다
이후 constructAttribute로 앞서 선택된 생성자, 필드명, parameter 등을 넘겨 바인딩되도록 한다

주석에도 나와있는 것처럼 생성자의 인자 개수가 없는 기본 생성자라면 JavaBeans 규약을 만족하는 것일 테니
constructAttribute()의 인자로 넘겨받은 parameter를 통해 추가 처리를 하지 않고 인스턴스화만 하여 그대로 반환한다
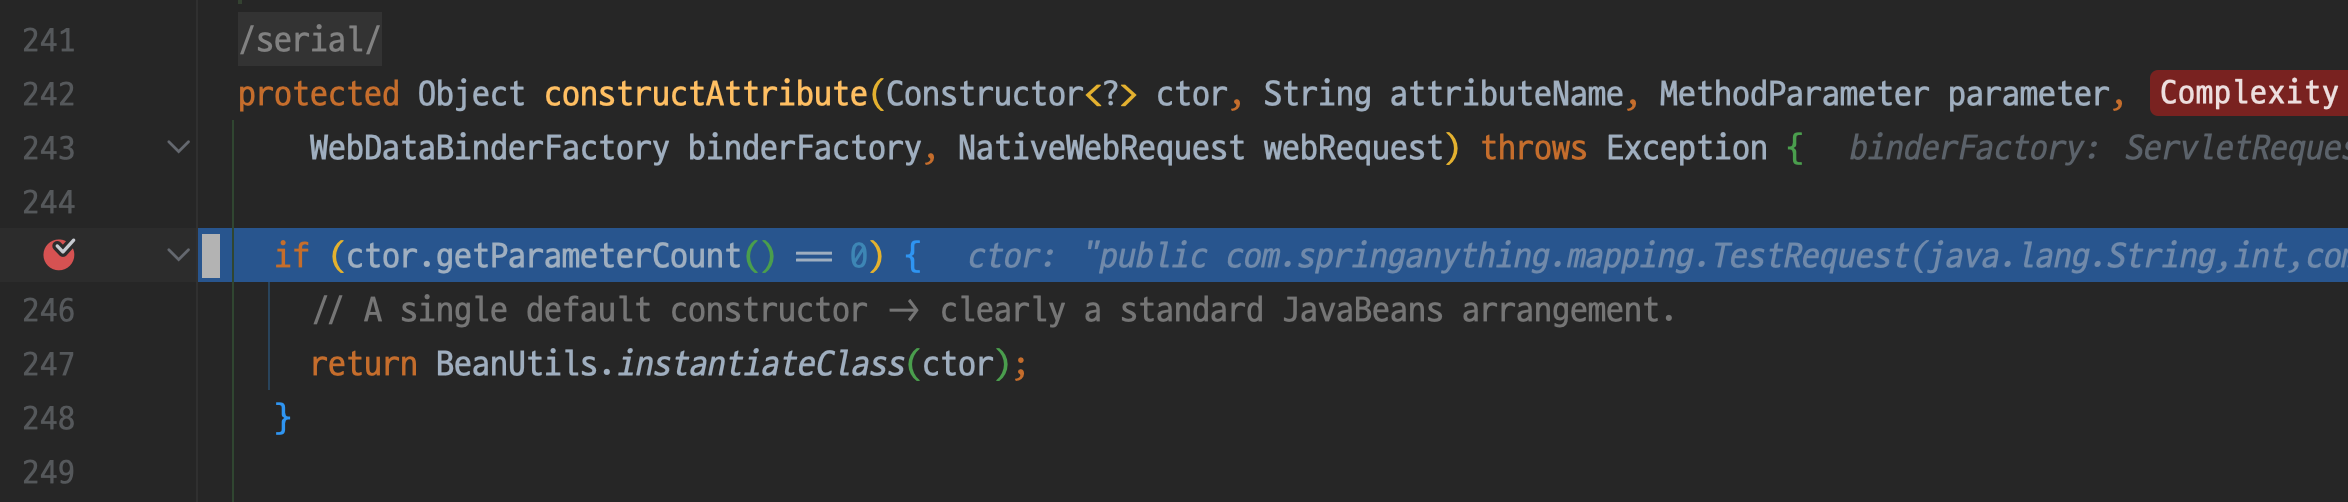
위 조건을 만족하지 않는 경우, 즉 기본 생성자가 없다면 아래 코드를 타게 된다
바인딩될 parameter의 이름, 타입을 선언하고 webRequest (ServletWebRequest의 인터페이스)에서 값들을 가져온다
그 아래에서 값의 형태에 따라 여러 처리를 해준다, 값이 배열인지 클래스인지에 따라 추가 처리가 필요하다
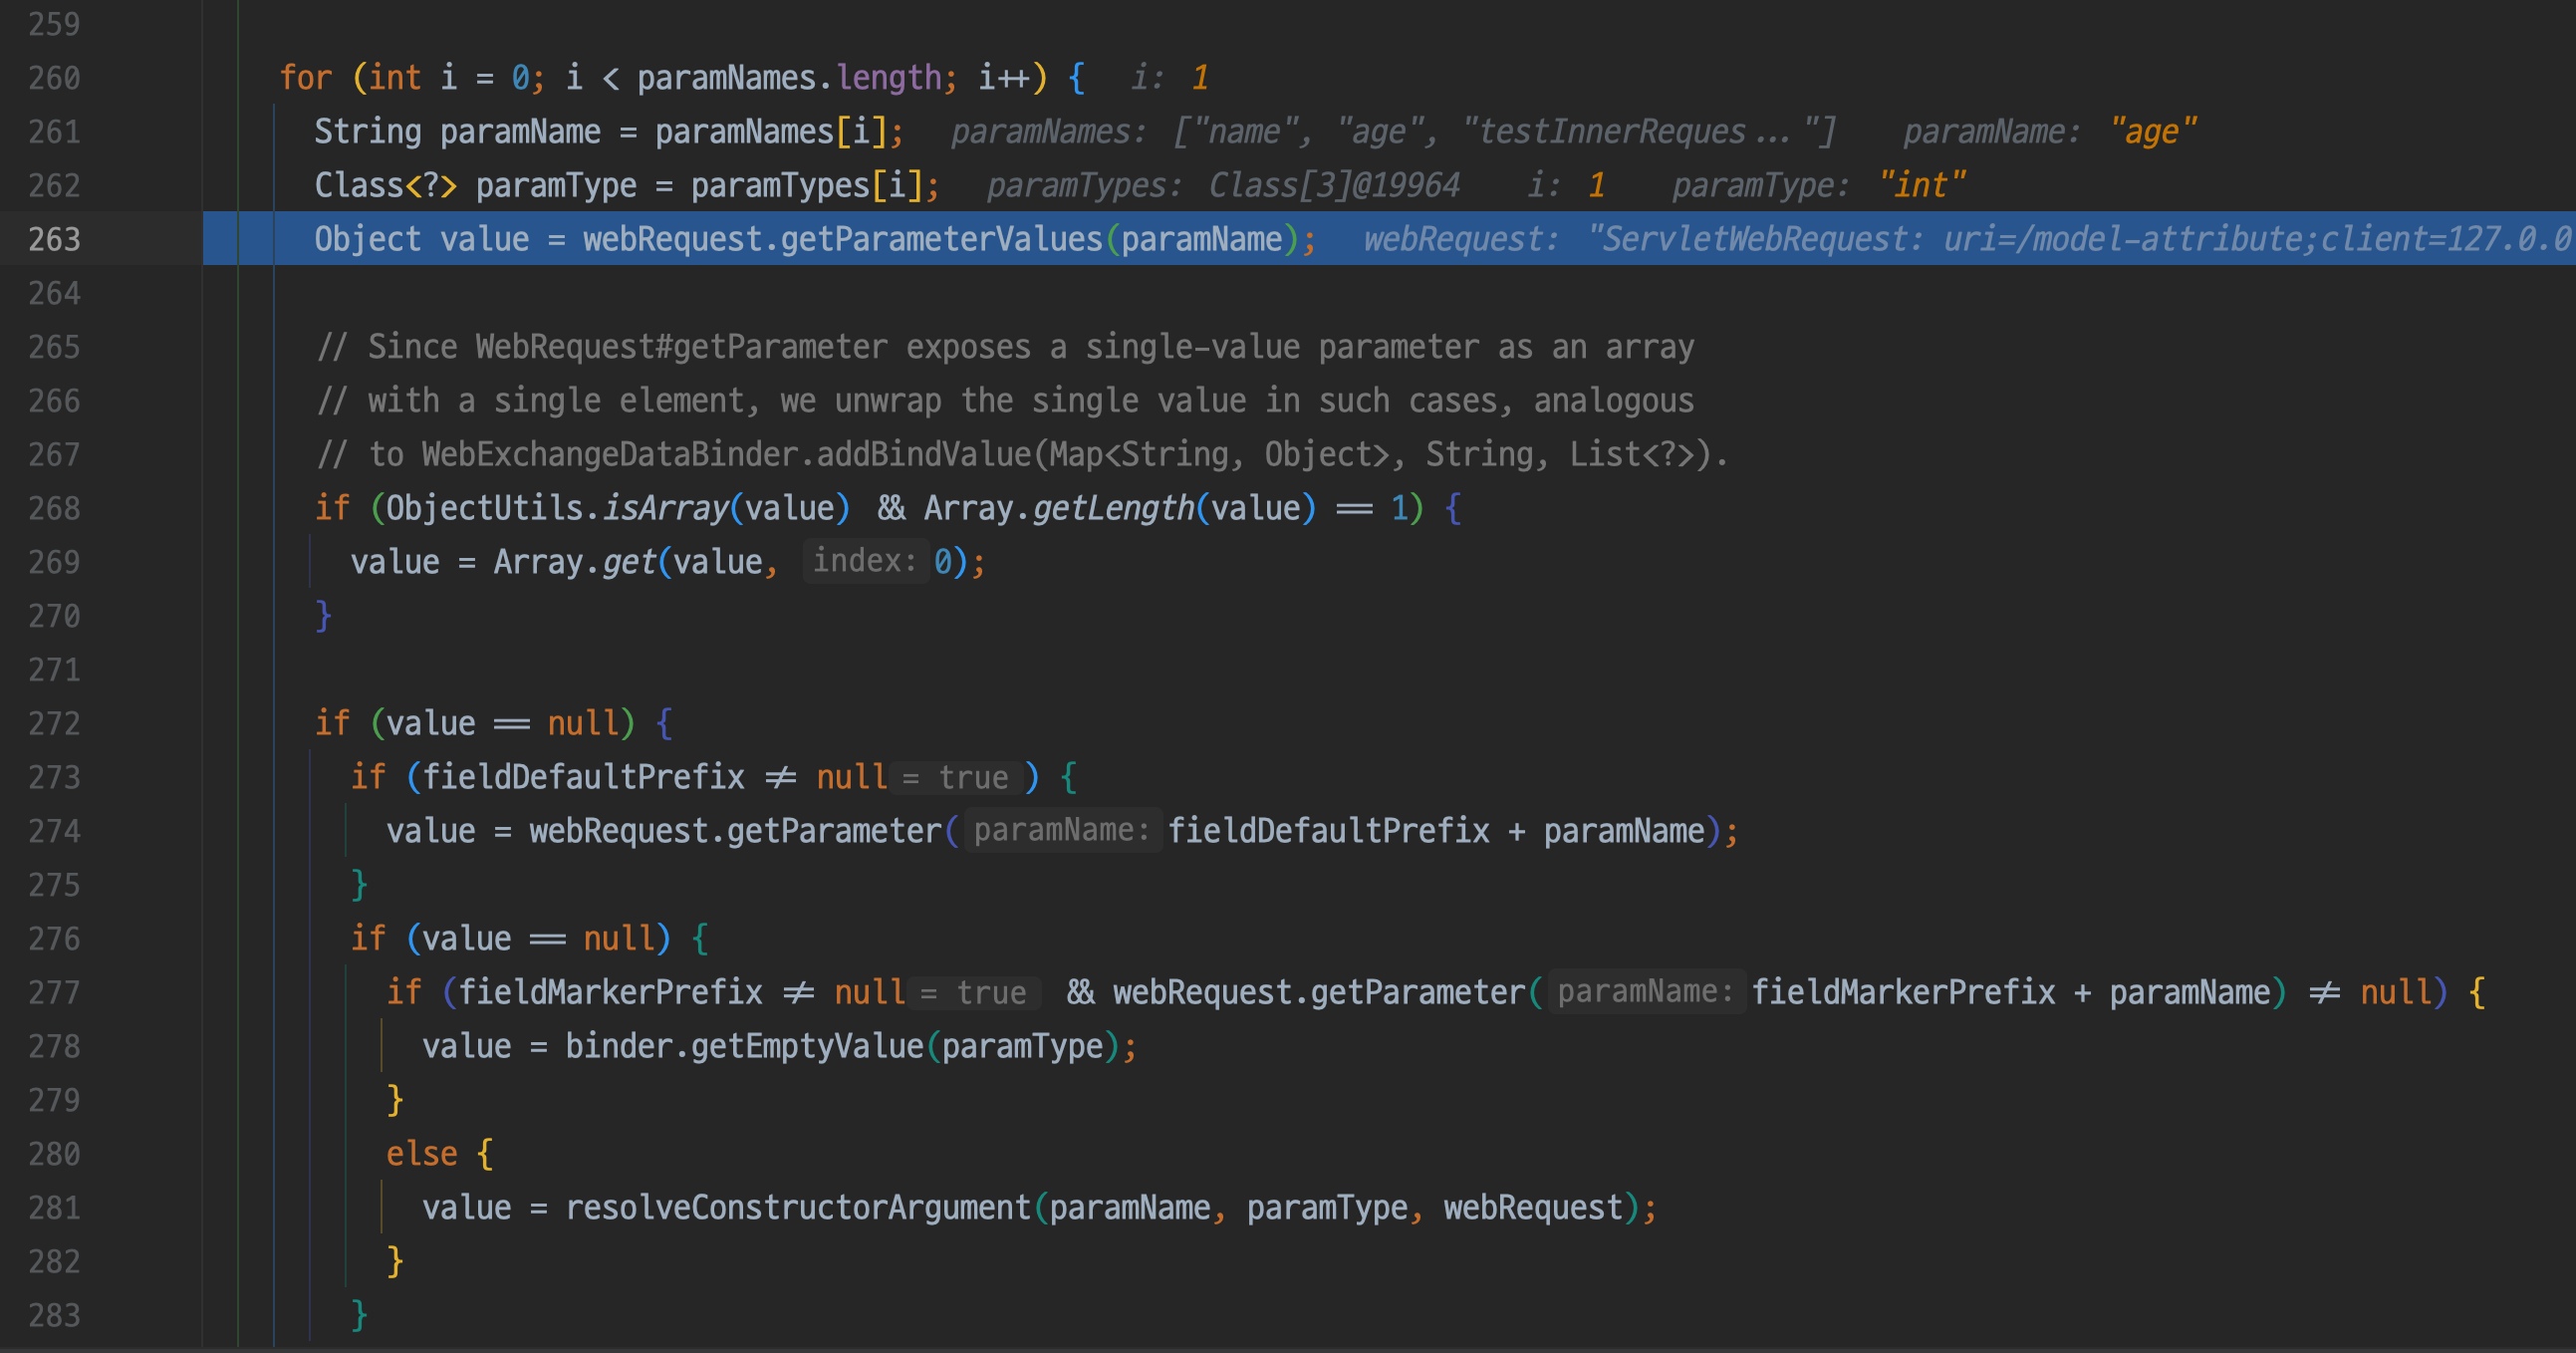
primitive type인 경우, 형변환이 필요하다면 해주고 이 외에는 추가 처리가 없이 생성자를 통해 바인딩된다
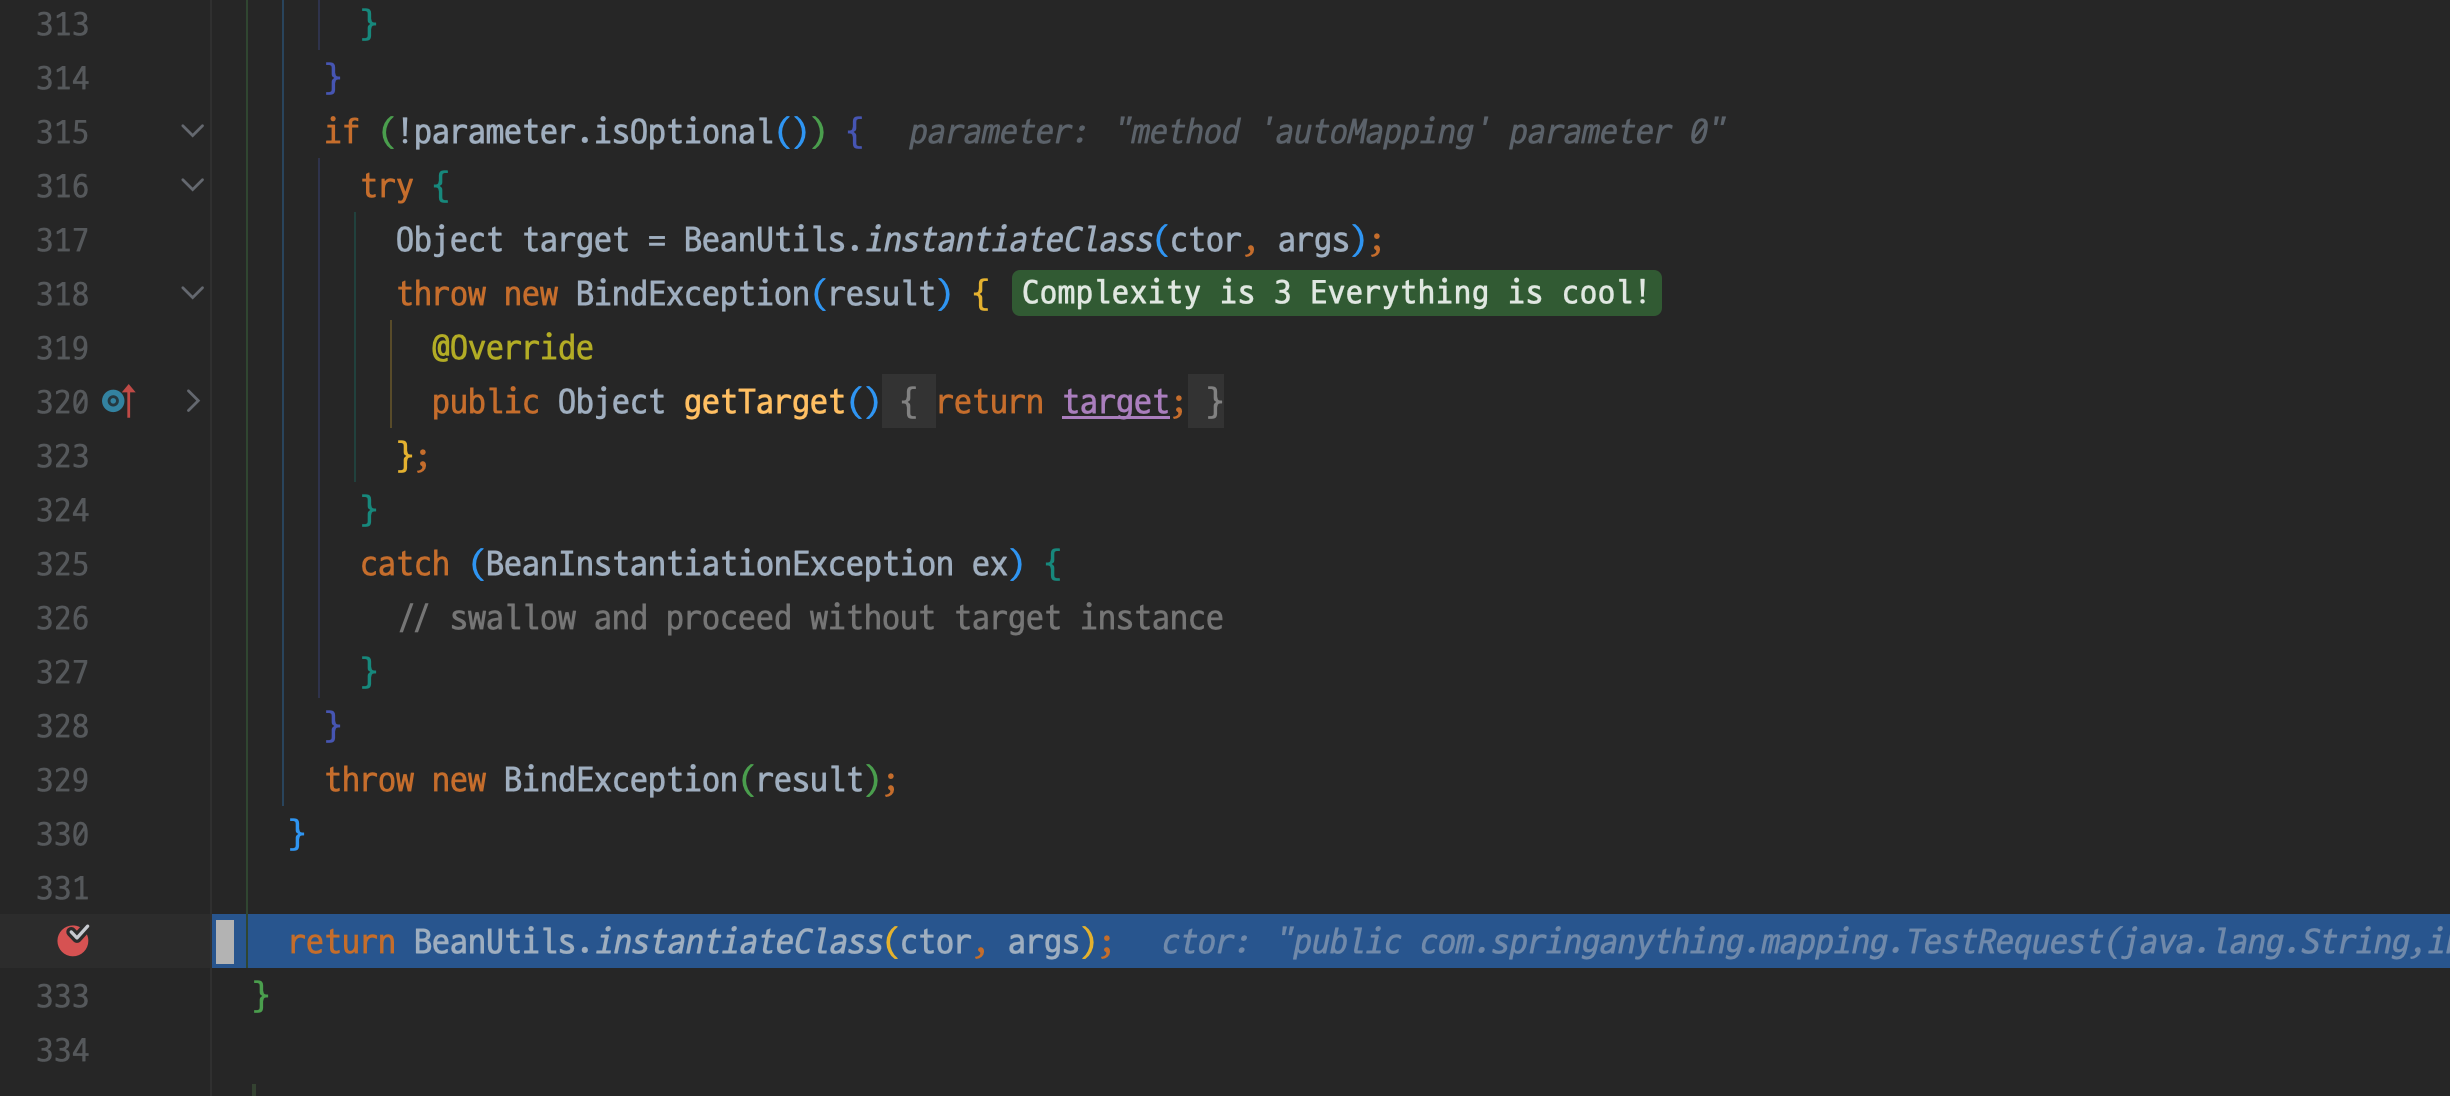
BeanUtils에서 인스턴스화를 할 때 주의할 점은 parameter type이 원시 타입이 아닌 경우 null을 넣어버린다는 점이다

따라서 @ModelAttribute로 바인딩시킬 객체가 기본형으로 이루어져 있다면 아무 문제 없이 바인딩되겠지만
객체 타입의 인자를 가지고 있다면 null로 바인딩될 것이다, 아래 testInnerRequest는 객체 타입이라 null 바인딩이 됐다

그렇다면 객체 안의 객체 매핑은 불가능한 것인가?
아니다, 생성자를 활용하는 경우에 매핑이 안 되는 것이고 이 때는 Setter를 이용하면 가능하다
Setter를 이용해 객체 타입을 매핑시키는 자세한 로직은
AbstractNestablePropertyAccessor를 살펴보면 되는데 여기서는 간략하게만 살펴보고 지나가겠다
생성자로 매핑되지 않는다면 (바인딩시킬 필드가 객체 타입이라면)
bindRequestParameters()에 의해 매핑 처리를 하는데 WebDataBinder를 이용해 bind 위임하는 메서드다

WebDataBinder는 super.bind()를 호출해 DataBinder의 메서드가 실행되고 내부에서 applyPropertyValues가 호출된다
PropertyAccessor를 가져온 후 setPropertyValues()를 호출해 값을 세팅해 준다

객체 타입의 경우 AbstractNestablePropertyAccessor의 메서드가 호출된다

256라인에서 PropertyPath는 testInnerRequest.innerName처럼 매핑받을 형태로 가져오고
감싸고 있는 객체를 명시하지 않고 필드명(innerName)으로만 매핑시키려 하면 아래 예외가 발생하니 주의해야 한다
266라인에서 setPropertyValue(PropertyTokenHolder, PropertyValue) 메서드를 호출해 매핑시킨다

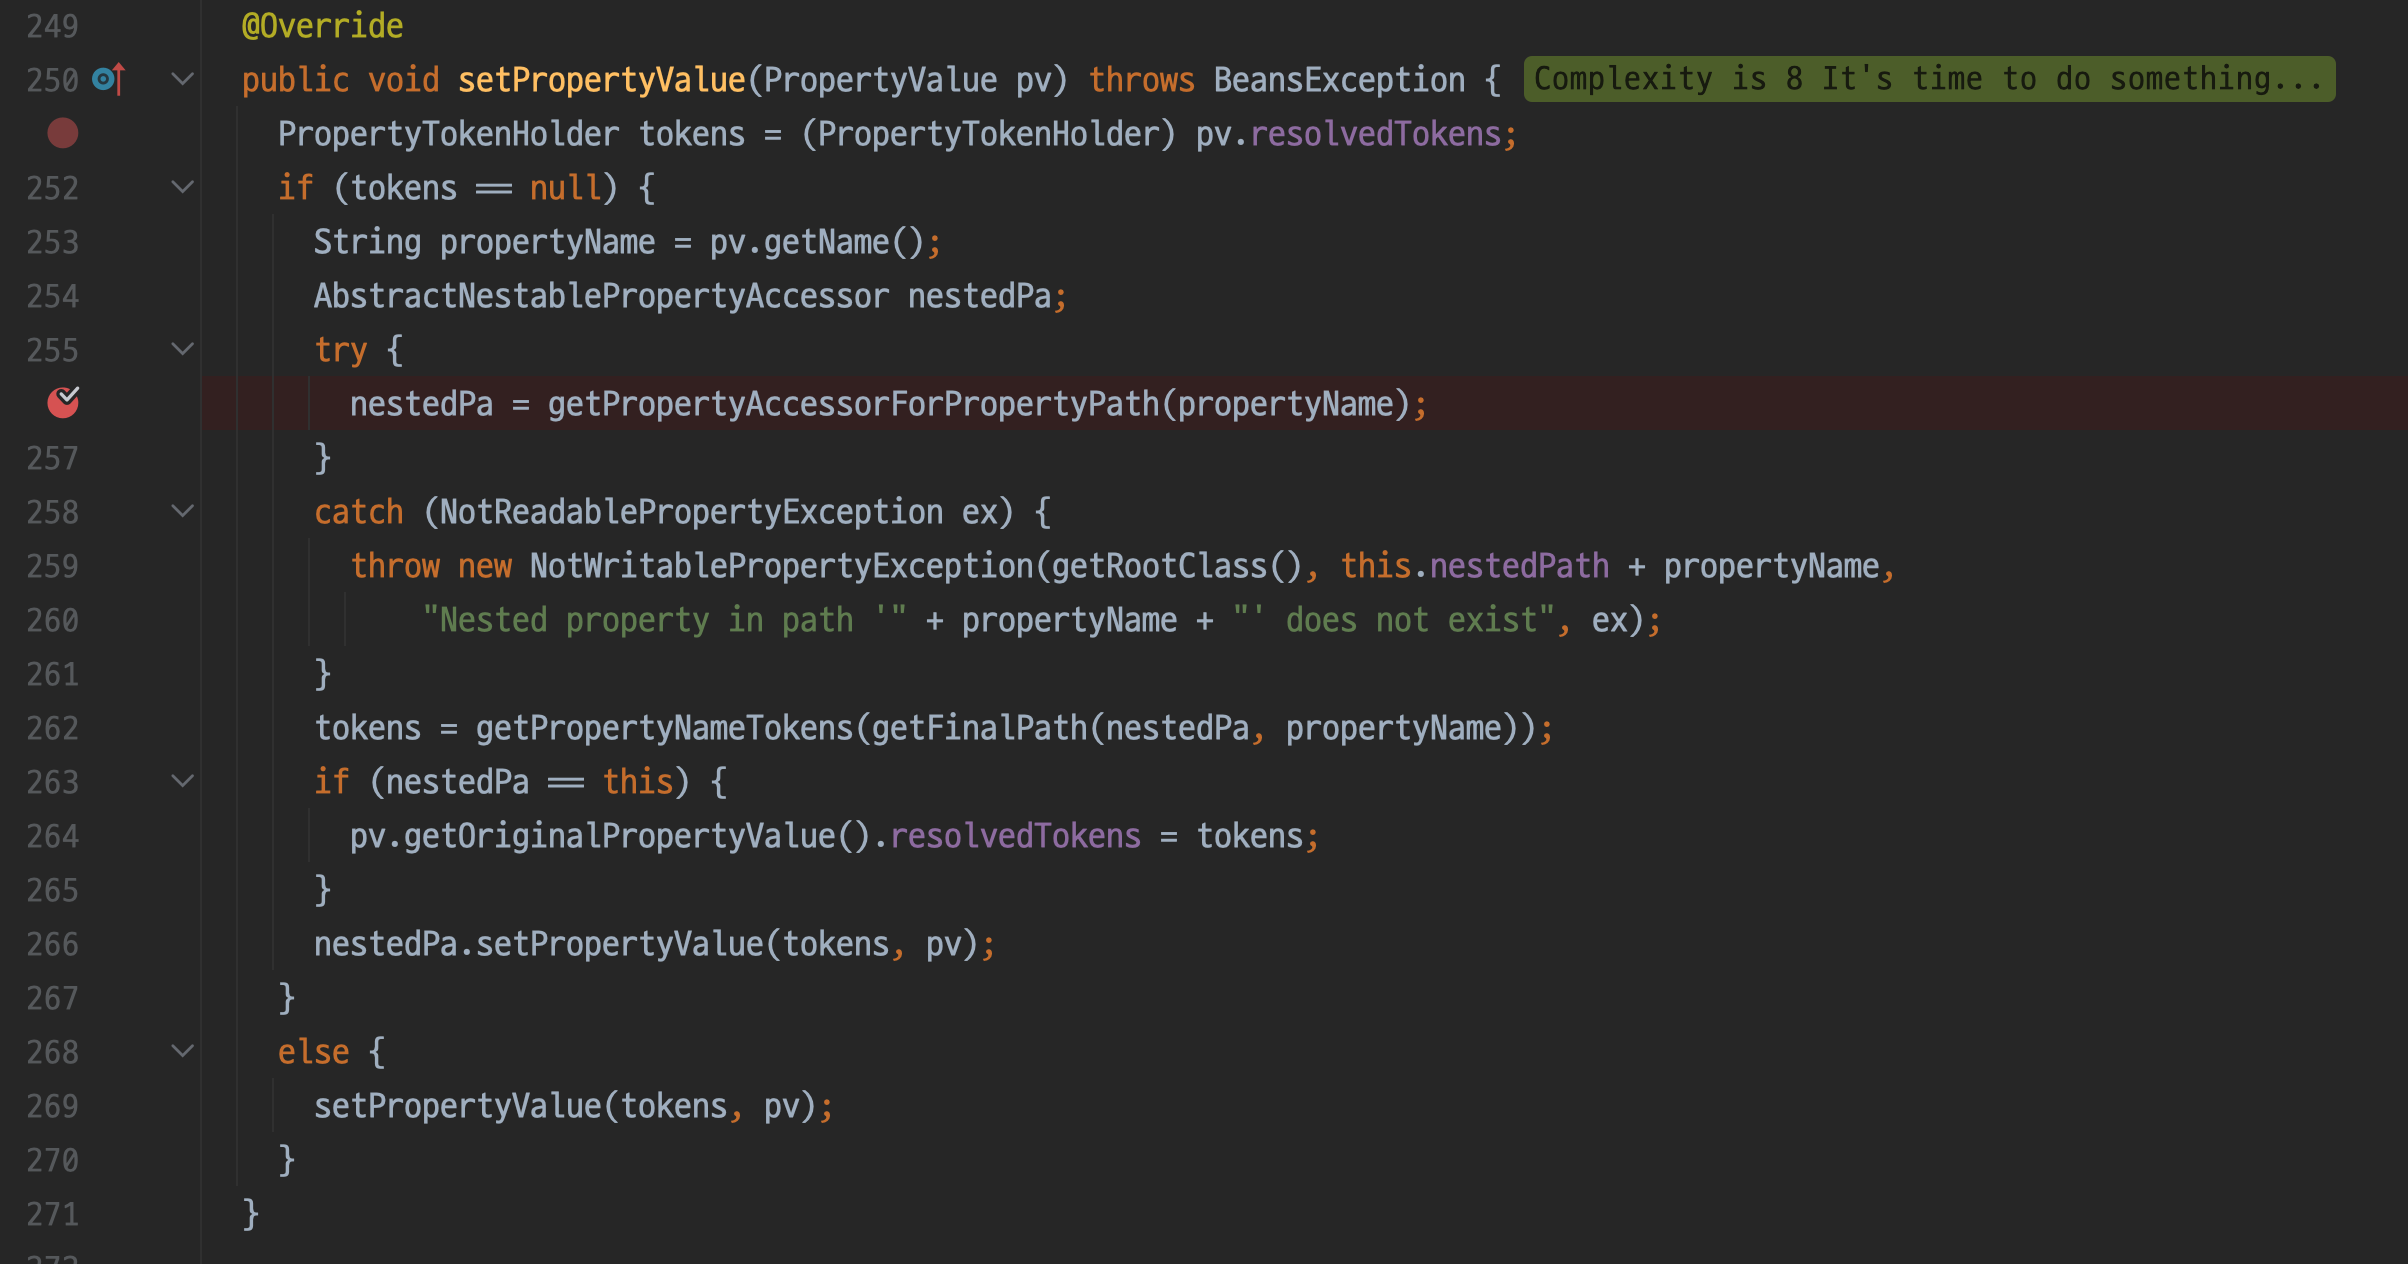
위에서 호출한 setPropertyValue(PropertyTokenHolder, PropertyValue) 메서드는 내부적으로
processLocalProperty()를 호출하고 PropertyValue에서 값을 뽑아와 매핑하는 것으로 마친다

그 결과 @Setter + AbstractNestablePropertyAccessor를 통해 resolveArgument에서 값이 매핑된 것을 볼 수 있다

DTO 안에 객체 타입이 필요한지 고민해볼 필요가 있다
@Setter 열고 맘 편하게 사용할 순 있지만 한번 열면 다시 닫기란 쉽지 않은 법이다
@Setter 닫기로 했다면 DTO 안에는 기본 타입의 필드만 사용하도록 하자
@GetMapping이 필요하지 않다면 @ModelAttribute를 막는 것도 방법이다
@RequestBody로 매핑시키면 @Setter 없이 @Getter로만 매핑이 가능하니 말이다
'Spring > Spring MVC' 카테고리의 다른 글
| multipart/form-data 요청과 non-ascii filename (0) | 2023.09.29 |
|---|---|
| CommonsMultipartResolver vs StandardServletMultipartResolver (0) | 2023.04.09 |
| @RequestBody, @ModelAttribute 매핑 방식의 이해 - 1 (0) | 2022.11.13 |
| [Swagger2] Failed to start bean 'documentationPluginsBootstrapper'; (0) | 2022.03.27 |